For stunning Milky Way photography, head to dark sky locations like national parks or deserts. Prime viewing is during new moon phases from late spring to early fall. Avoid light pollution for optimal results. Focus on capturing the galactic center's brilliance, visible in the southern sky. Utilize a star tracker for sharper images. Plan your trip in advance and check a moon phase calendar.
Understanding the Milky Way's Visibility
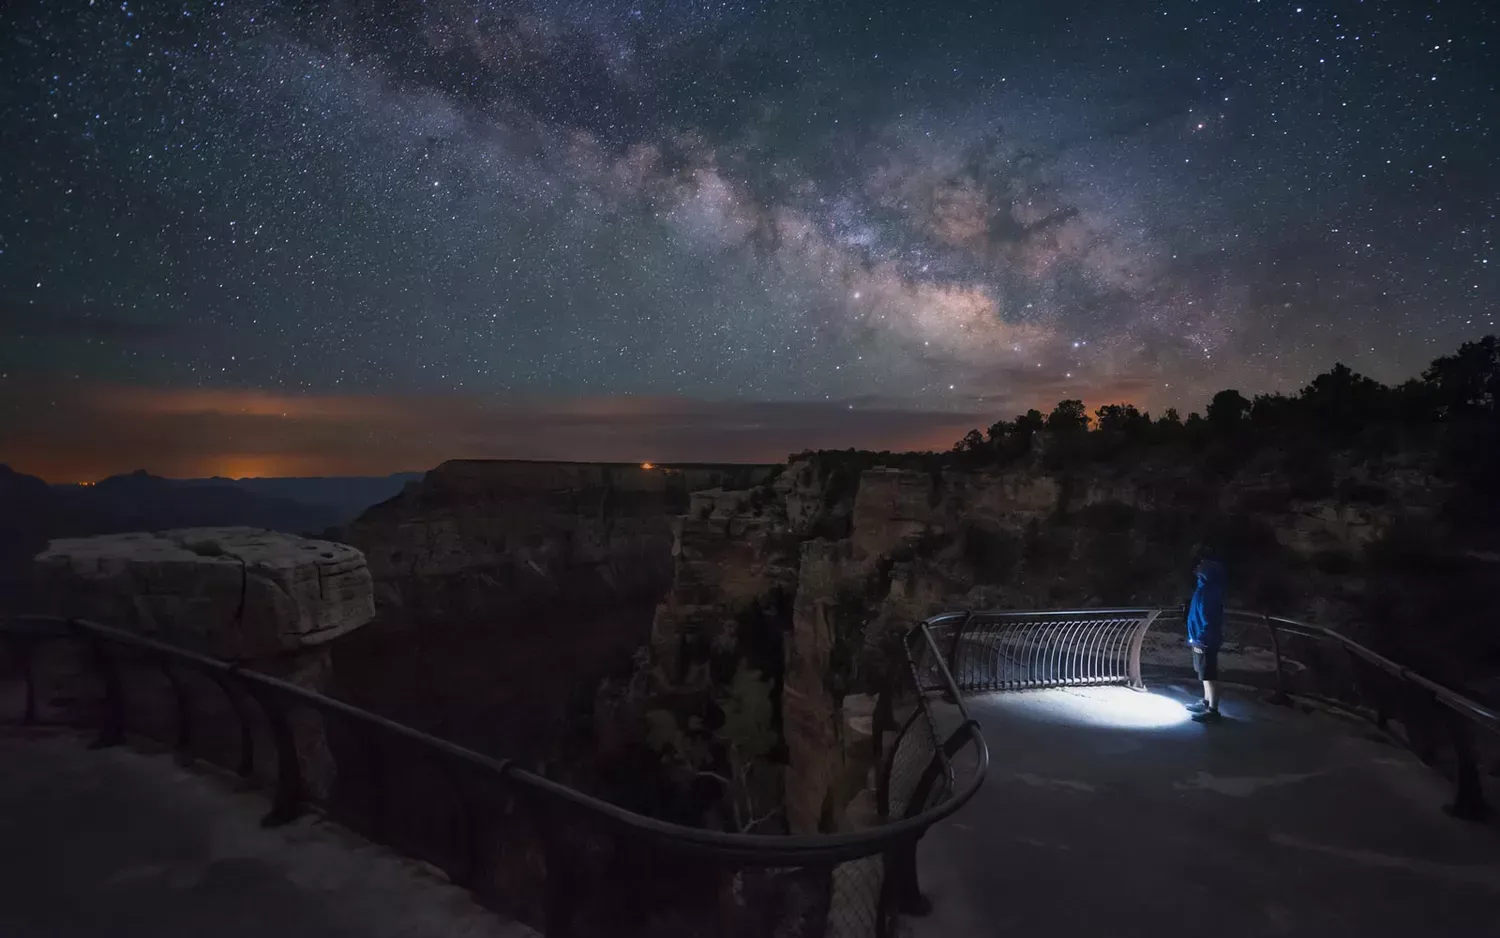
The Milky Way isn't visible all the time. Its appearance is heavily influenced by the Earth's rotation, the position of the sun, and light pollution. During the daytime, the sun's glare completely washes it out. Even at night, moonlight can significantly diminish its visibility. The core of the Milky Way, which is the brightest and most impressive part, is best viewed during specific months when it's high enough in the sky during the darkest part of the night.
Here are the key factors that determine when and where you can best see the Milky Way:
Dark Skies: Minimal light pollution is paramount. Escape city lights and head to designated dark sky parks or remote areas.
New Moon: The absence of moonlight allows for the faintest stars and the Milky Way's delicate details to become visible.
Time of Year: The Milky Way's core is most visible during the late spring, summer, and early fall months.
Time of Night: As the Earth rotates, the Milky Way rises and sets. Check astronomical resources to find when it will be at its highest point in the sky for your location.
Prime Viewing Months and Moon Phases
To help you plan your Milky Way photography expeditions, consider these prime viewing windows, keeping in mind that local conditions can vary:
Month |
Best Viewing Window (Approximate) |
Moon Phase Considerations |
Tips |
|---|
April |
Late April (late night/early morning) |
Watch for the new moon towards the end of the month. |
The Milky Way's core will be just starting to become visible in the southeast. This is a good time for early planning and scouting locations. |
May |
May (late night/early morning) |
New Moon: Mid-May. Aim for the week surrounding this date. |
The core rises earlier. Practice your focusing techniques and polar alignment if you're using a star tracker. |
June |
June (late night/early morning) |
New Moon: Mid-June. Prime viewing time around this date. |
The Milky Way is becoming more prominent. Explore different compositions and foreground elements. |
July |
July (most of the night) |
New Moon: Mid-July. Ideal conditions for extended shooting. |
The core is high in the sky for a longer duration. This is arguably the best month for Milky Way photography. |
August |
August (most of the night) |
New Moon: Mid-August. Another excellent month for astrophotography. |
Similar to July, the Milky Way is readily accessible. Experiment with different lenses and shooting angles. Perseid Meteor Shower occurs mid-August. |
September |
September (early evening/late night) |
New Moon: Mid-September. The core is still visible, but setting earlier. |
The Milky Way is starting to fade slightly, but still offers great opportunities. |
October |
Early October (early evening) |
New Moon: Early October. Last chance to see the core of the Milky Way before it disappears for the winter. |
Focus on capturing the Milky Way shortly after sunset. |
Top Locations for Milky Way Photography
Finding a truly dark location is crucial. Here are some types of places to consider, and some specific examples:
Dark Sky Parks: These are officially designated areas with minimal light pollution. Examples include Death Valley National Park (USA), Cherry Springs State Park (USA), Aoraki Mackenzie International Dark Sky Reserve (New Zealand).
Deserts: Arid regions often have clear skies and low population density. Examples include the Atacama Desert (Chile), the Sahara Desert (Africa), and the Australian Outback.
Mountainous Regions: High altitudes and remote locations offer dark skies. Examples include the Swiss Alps, the Himalayas, and the Andes Mountains.
Rural Areas: Away from major cities, even smaller towns can offer surprisingly dark skies. Use a light pollution map to identify promising locations.
Before heading out, check light pollution maps (available online) to confirm the darkness of your chosen location. Apps like PhotoPills and Stellarium are invaluable tools for planning your shots, predicting the Milky Way's position, and calculating optimal shooting times.
Essential Gear for Milky Way Photography
To capture stunning images of the Milky Way, you'll need the right equipment:
DSLR or Mirrorless Camera: With manual control and good low-light performance.
Wide-Angle Lens: A fast lens (f/2.8 or wider) is ideal for gathering as much light as possible.
Sturdy Tripod: Essential for long exposures.
Remote Shutter Release: To minimize camera shake.
Headlamp with Red Light: To preserve your night vision.
Star Tracker (Optional): For longer exposures without star trails.
Photography Tips for Capturing the Milky Way
Here are some tips to help you get the best Milky Way photos:
Shoot in RAW: This allows for maximum flexibility in post-processing.
Use Manual Mode: Control your aperture, shutter speed, and ISO for optimal exposure.
Focus Carefully: Use live view and zoom in on a bright star to achieve sharp focus.
Experiment with ISO: Start with a high ISO (e.g., 3200 or 6400) and adjust as needed.
Take Multiple Exposures: Stack them in post-processing to reduce noise.
Post-Process Your Images: Use software like Adobe Photoshop or Lightroom to enhance details, reduce noise, and adjust colors.
By carefully planning your trips around the lunar cycle, choosing dark locations, and equipping yourself with the right gear and knowledge, you can capture breathtaking images of the Milky Way and experience the wonders of the night sky.